DIY BOOK SLEEVE
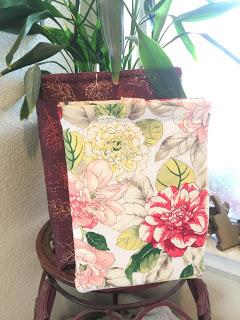 |
| Two of the recent book sleeves I've made. So, I've seen a lot of super cute book sleeve shops all over instagram lately, including one of my favorites, the famous Book Beau. As lovely as they are, they do range from 30-40 dollars and only get more expensive. Being a broke college student, I don't have that money to spend no matter how much I love and want to protect my books. I have a saying, "If you can’t afford it, make it yourself." And I did, now I want to share the process with you guys. |
What you’ll need: *** I found everything at Walmart ***

- Spray on adhesive -Walmart (start at $5)
- ½ yard of foam padding (makes two sleeves) - You can pick any width you’d like, mine isn’t very thick (prices vary)
- ½ yards of fabric of your choice (makes two sleeves)- Prices start from $1.50
- Good scissors (you want to make sure they cut well or you’ll just ruin your fabric)- $2.49
- [*OPTIONAL*] Tape (I suck at cutting straight so the tape was like a guide) - $2.23
- Pins (to hold the fabric in place) - $2.97)
- Needle & thread (colors should be as close as possible to the color of your fabric)- $1-3
- A book to measure the size of your sleeve

1. Start off by laying your fabric out. You’ll notice that the half yard of fabric is twice as long as the foam. Lay the foam to one side of the fabric. *I like to leave about 2 inches at the end.

2. Bring the rest of the fabric over over so that the two fabric ends meet. *Making a foam sandwich.

3. Pin the closed end so that the fabric is attached to the foam. *This will end up being part of the opening.
4. Now that it's pinned in place, and your fabric covers most of the foam, (you don't want to waste material) run your hand over the fabric and flatten out all the wrinkles.

5. Pin down the two inches we left at the end. *Lift up the foam and pin it inwards.


6. In this one, my fabric ran long so I had this much extra. If you do, just fold it over & pin to hold it in place.

7. Okay, now that everything (both ends, not the sides) is pinned in place, it's time to join the ends. *Fold up hamburger style, a.k.a horizontally.


8. Place your measuring books inside. Pin the fabric in between, that will be your cutting guide.


**Give each about 1"(1"& 1/2") of space on either side.**

9. *Here's the optional tape part* Place the tape alongside the pins and use the edge of the tape as a cutting guide to get a decently straight edge when you cut.

10. Now we can work on one piece at a time.

Chose the side you want to start with and lay it out.

11. Unpin the "extra" piece. That will let you open up the fabric.

12. Open up the fabric exposing one side of the foam.

13. Shake up your spray on adhesive. Start spraying closest to the pins, in small sections so you have time to lay down your fabric. *Spray, lay down your fabric over the section you glued, press down and smooth out any wrinkles all the way down.


***Repeat step 13***

15. This side has the 2" of fabric we folded over in the beginning. Lift it up, spray down the foam and glue the 2" down. Then spray some glue over the 2" and lay down the remaining fabric.
*** We're done with the glue after this, so let it dry while you wash your hands ***

16. Rejoin your ends making sure they're the same height. *You'll want to leave the side with the "extra" piece on the outside since we'll be turning it inside out once it's stitched.

17. Place your book inside to measure again. Pin down the corners where you see fit to stitch. *Make sure your book fits snug inside, and doesn't fall out.
[ Side note: as you see here. my edges are a lot taller than my book. I folded the top down and pinned it to hold it in place. They will be stitched as the margin in the next step. You want the top of your sleeve to only be centimeters taller than your book (Just enough to protect the top of the book). If you want to leave it long like that it's totally up to you though. ]

18. *This is mine already done & turned over but basically this is just a stitching guide. For the vertical arrow sides, you stitch together the front and the back piece. *This will shut the sides creating the pouch. For the horizontal arrow, you will be stitching this one on the back and on the front INDIVIDUALLY to create a margin.
*** REMEMBER ***: This side will end up inside so no one will see the starting points of your stitches.

19. After you stitch the margins and the sides, cut off the corners (on the outside of your stitches) like so. *This will give you the rounded edge look.
20. Lastly, reach in and turn the whole thing inside out! Gently push out your sides/ corners & YOU'RE DONE!
❤❤❤ I hope this guide was helpful to you guys! Please don't hesitate to comment down below, message me through email, on instagram, or twitter if you get stuck! ❤❤❤
No comments:
Post a Comment